Tongue Position for Z
Produce the voiced alveolar /z/ sound
Tongue Position Illustration
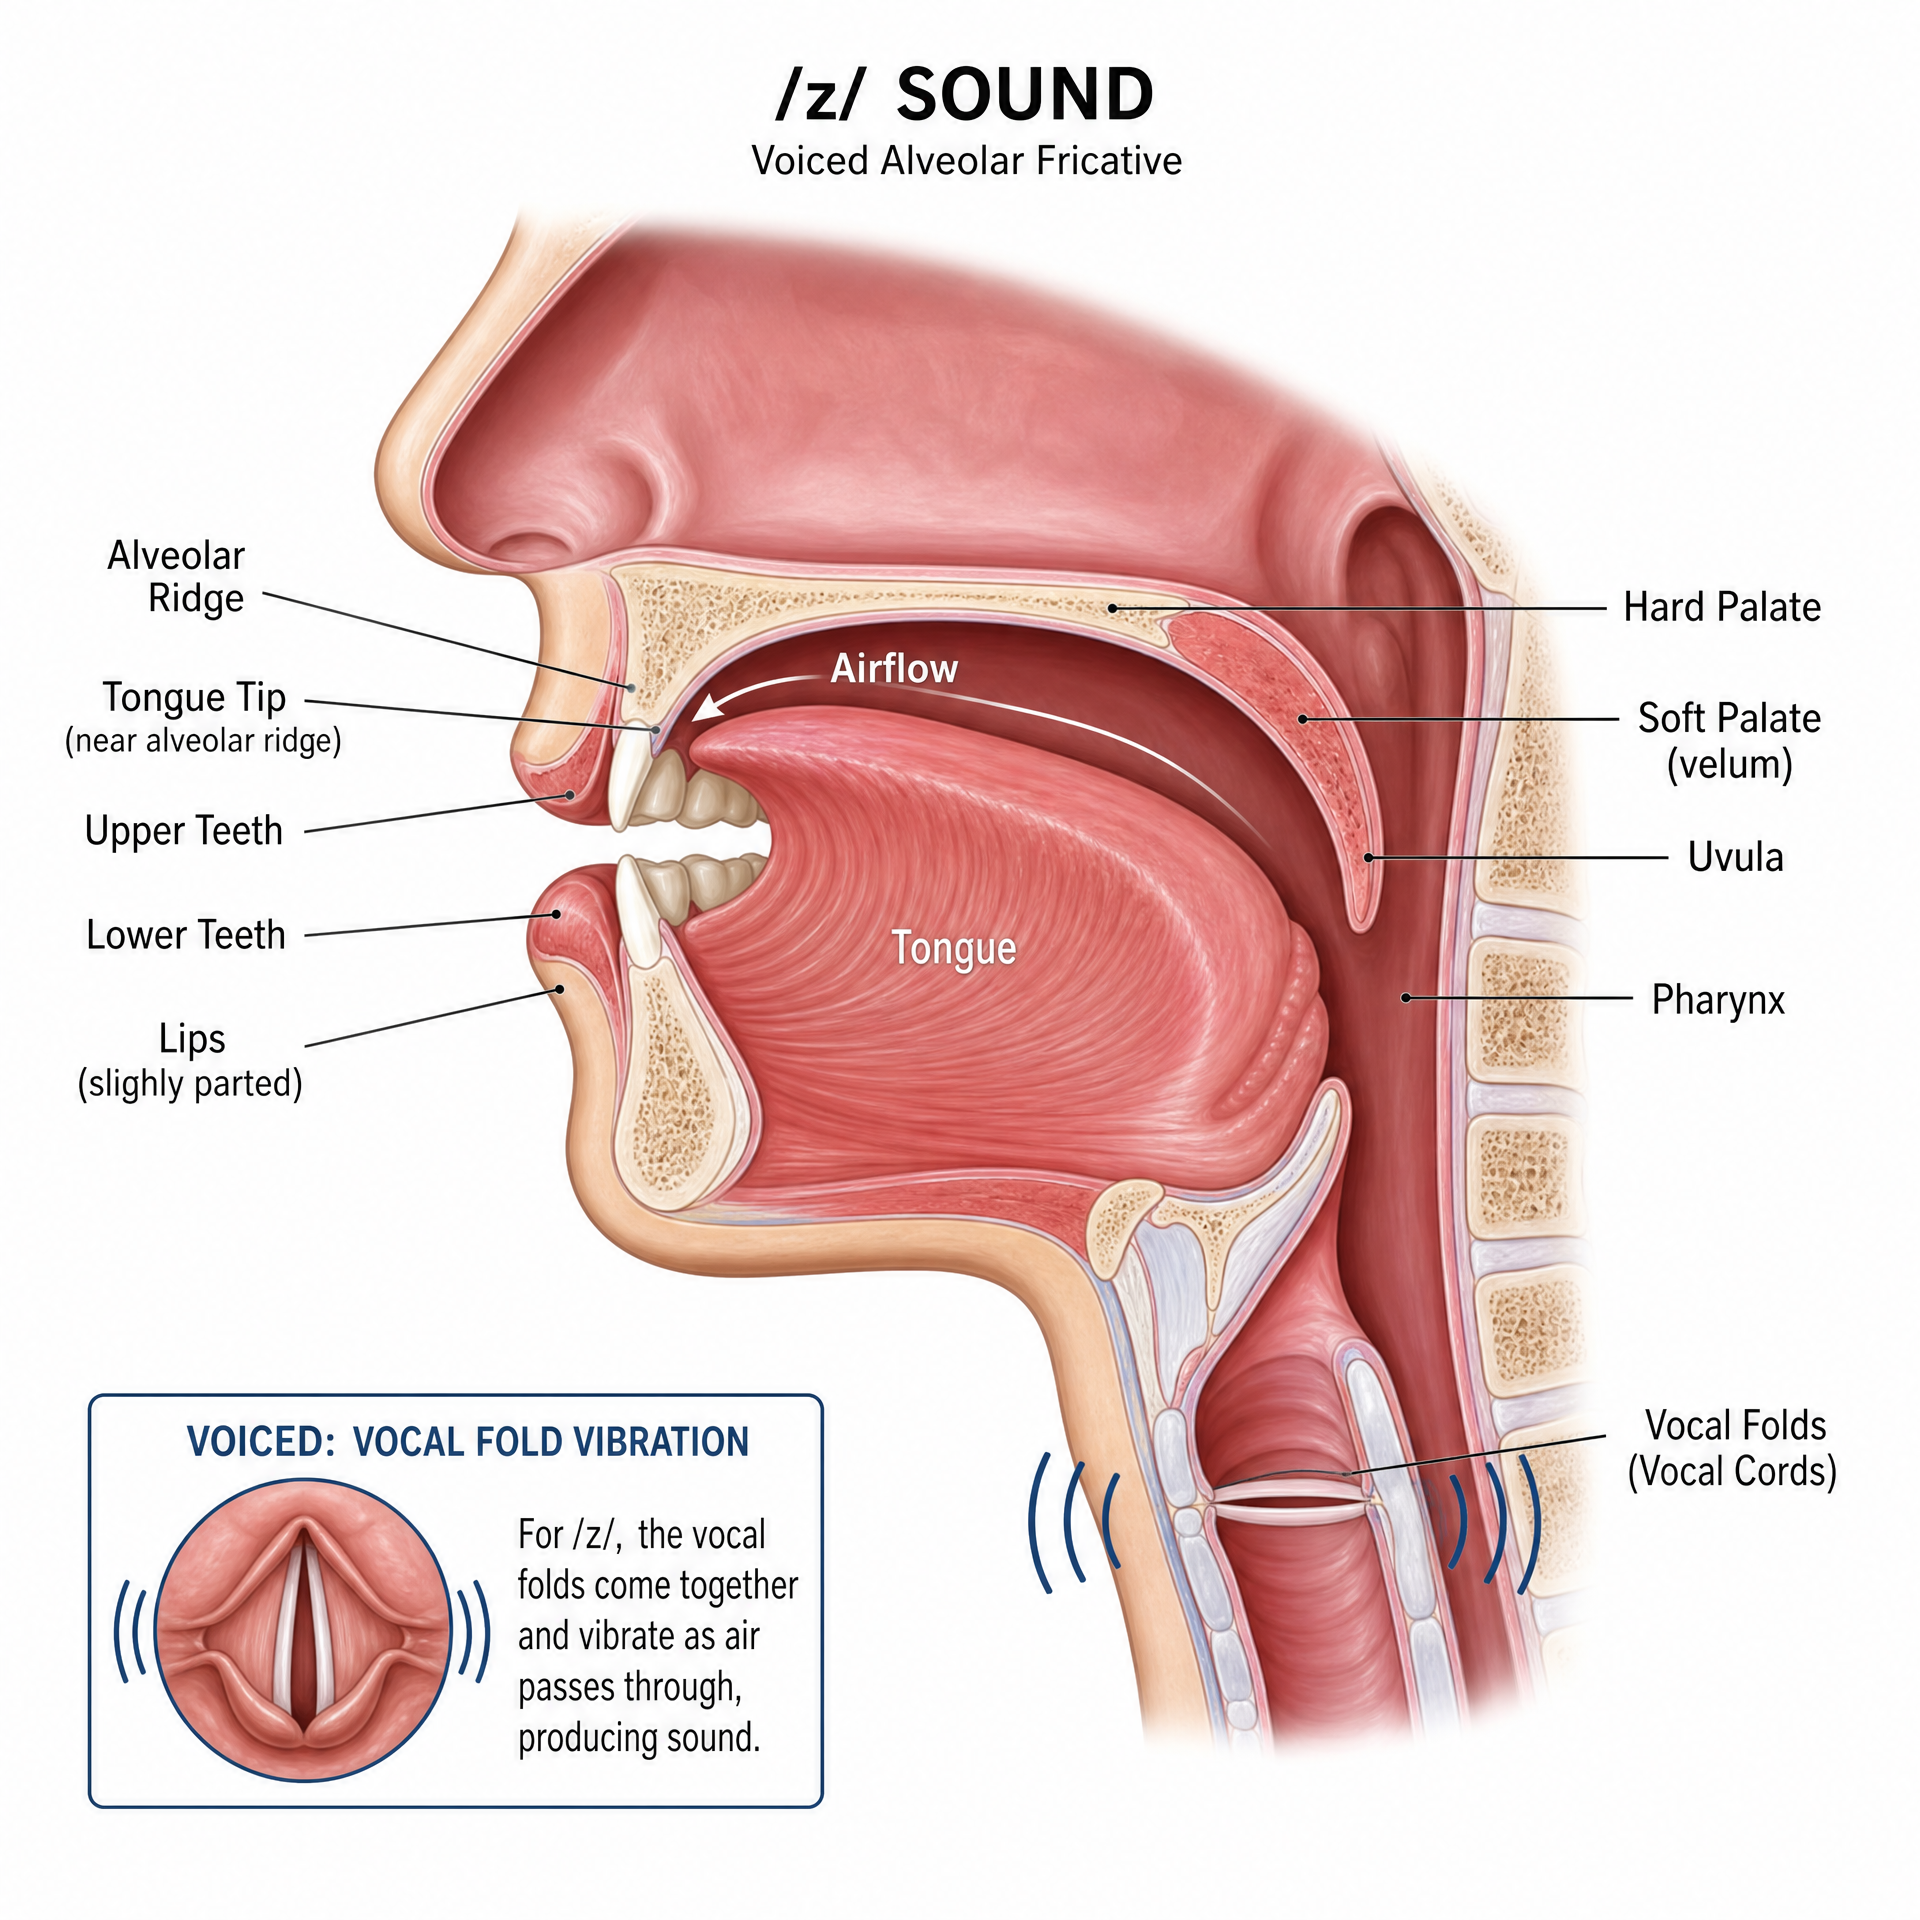
How to Produce the /z/ Sound
The /z/ sound is the voiced counterpart of /s/. The tongue position is identical to /s/, but your vocal cords vibrate. This creates a buzzing sound instead of a hissing sound. The /z/ appears at the end of plural nouns and in other positions in words.
Side View
The tongue tip is close to the alveolar ridge, creating a narrow channel for air. Lips are slightly spread.
Front View
Teeth are close together, and lips are slightly spread. The tongue is not visible between the teeth.
💡 Tip: Feel the vibration in your vocal cords. If you don't feel it, you're likely making an /s/ sound.
Practice Words for /z/
Listen and repeat these words to practice the /z/ sound:
Zoo
Zebra
Buzz
Zip
Lazy
Fizz
Haze
Dizzy
Fuzzy
Amazing
Crazy
Surprise
Minimal Pairs: /z/ vs /s/
The /z/ and /s/ sounds are often confused. Practice these pairs to hear and produce the difference:
With /z/
Zip
With /s/
Sip
No audioWith /z/
Zoo
With /s/
Sue
No audioWith /z/
Buzz
With /s/
Bus
No audioWith /z/
Fizz
With /s/
Fiss
No audioWith /z/
Haze
With /s/
Hays
No audioWith /z/
Lazy
With /s/
Lacy
No audioCommon Mistakes with /z/
-
❌ Mistake: Forgetting to voice the sound (making it /s/ instead)
✓ Fix: Remember to vibrate your vocal cords for /z/. Place your hand on your throat to feel the vibration. -
❌ Mistake: Placing the tongue too far back (sounding like /zh/)
✓ Fix: Keep the tongue tip close to the alveolar ridge, but not touching it. -
❌ Mistake: Creating too much air pressure (sounding harsh)
✓ Fix: Allow a steady, controlled stream of air to buzz out.
Practice Tips for /z/
- 💡 Tip 1: Practice making a long, buzzing /z/ sound, like a bee.
- 💡 Tip 2: Place your hand on your throat to feel the vibration while making the sound.
- 💡 Tip 3: Practice minimal pairs with /s/ to clearly distinguish the two sounds.
- 💡 Tip 4: Record yourself and compare with native speaker audio.